Hi Beaders!
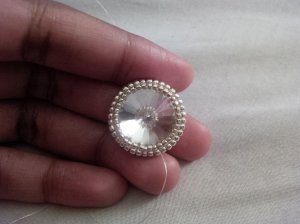
Such wonderful things can happen when you’re A) having fun or B) go where you’re curiosity takes you. This Sunday was such a day. I recently purchased a Chinese crystal rivoli from work just to practice with. Not as brilliant as Swarovski, but will do just fine to play with. I wasn’t up to trying to figure out how many beads I needed to make a peyote bezel, so out of curiosity I wanted to see what a herringbone bezel could look like.
I’m happy to say it came together much better than I thought! So I made a video showing my steps on how to do this.
I’m now aware that there are a few beaders that have done this kind of bezel but I only found out after I made mine, so I didn’t learn this or lift this technique from another beader. Honestly I think it’s just a natural progress in beading. Just be curious, ask questions and see where your curiosity takes you.
For the video tutorial, please click here. Feel free to share with your rivoli-bezel-challenged friends! This could save lives!
LOL, well, not lives… but it could put a lot of hopeless rivolis to good use 🙂
Happy beading!
-Mandi

Beautiful!
Thank you! and thanks for stopping by 🙂
thank you for putting this together. I will be sharing a link to this on my BEAD WISE CHAT page on Facebook. And I thank you again for educating me today!
Hi Jess! you are very welcome and thank you for sharing this on your page. May I have the link? I would like to check it out.
I love it.. Thank you so much. I have been fighting and fighting with an Eagle cab, and this would work wonderfully.. Thank you for teaching this technique! You are a lifesaver. Now I have to go back and take this mess out .. or cut and throw to side, hee hee, and start with the herringbone! Ty ty ty ty
You are most welcome! I hope this helps you out. If you don’t mind, I’d love to see this Eagle cab once you bezel it. Good luck and have fun! 🙂
I just love this technique, it will be great for my next project